I could talk about how great Divi is for hours. It’s a very powerful theme, but I feel as if the header customization options are somewhat lacking. No offense to Elegant Themes. I know that they have all sorts of upgrades that they are working on and I believe that they will be adding more header customization options soon. In the meantime though, you can follow this tutorial to be able to use the Divi Builder to create your header.
Create a Child Theme

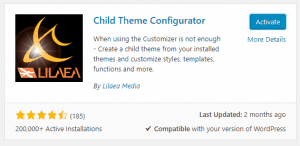
There are various methods you can use to create a child theme, but I’m going to keep it simple and use the “Child Theme Configurator” plugin by Lilaea Media. Install the plugin and activate it. Then go to Tools->Child Themes on your sidebar. Select “Create a new Child Theme,” choose Divi as the parent theme and then click Analyze. On step 7, click show/hide child theme attributes. This is where you can set up the name, URL, etc for your child theme. For simplicity, I’m going to leave the default values in for this tutorial. Finally, click Create New Child Theme at the bottom.
Once your child theme is created, go into Appearance->Themes and activate it. Congratulations! You’ve just successfully created a new child theme. At this point you are welcome to delete the Child Theme Configurator plugin if you would like.
Creating the Header in the Divi Builder
Next we’ll create a simple header with the Divi Builder. Create a new page, add a one-column row, and then add a text module to it. Save this layout to your Divi Library. I’m going to call mine “Main_Header.” Now you can simply trash this new page that you started to create.
Go to Divi->Divi Library and then click on your newly created layout. This is where you’ll go to make modifications to your header. You’ll need to take note of the post id for your layout. This can be found in the URL. ![]()
Copying and Modifying header.php
Now that we have the post id we can proceed to make a custom header.php file to display our new header. You’ll need to make a copy of the header.php file from the Divi theme directory and place it into your child theme directory. I used cPanel’s file manager to do this, but you could use FTP instead. Once you do so, you can actually edit the file right from the WordPress sidebar.
Go to Appearance->Editor and then select the header.php file. Delete everything that comes after the HTML <body> tag and then copy and paste the following code under it.
	<?php
		$main_header = ob_get_clean();

		/**
		 * Filters the HTML output for the main header.
		 *
		 * @since ??
		 *
		 * @param string $main_header
		 */
		echo apply_filters( 'et_html_main_header', $main_header );
		echo do_shortcode('');
	?>
		<div id="et-main-area">
	<?php
		/**
		 * Fires after the header, before the main content is output.
		 *
		 * @since ??
		 */
		do_action( 'et_before_main_content' );
You’ll then need to add the following code in between the single quote(‘) markers of the do_shortcode function. However, you’ll need to change the highlighted post ID number to your post ID number that you noted earlier.
![]()
So this line of code should look similar to this after you have added and modified it.
![]()
That’s it folks! I’d like to give a shout out to Geno Quiroz for his awesome tutorials.I learned the technique of adding Divi layouts into code from one of his tutorials. If you have any questions, please comment below. Check back for another tutorial coming soon that will discuss adding a navigation/menu system. For now you can see an example header possibility below.

